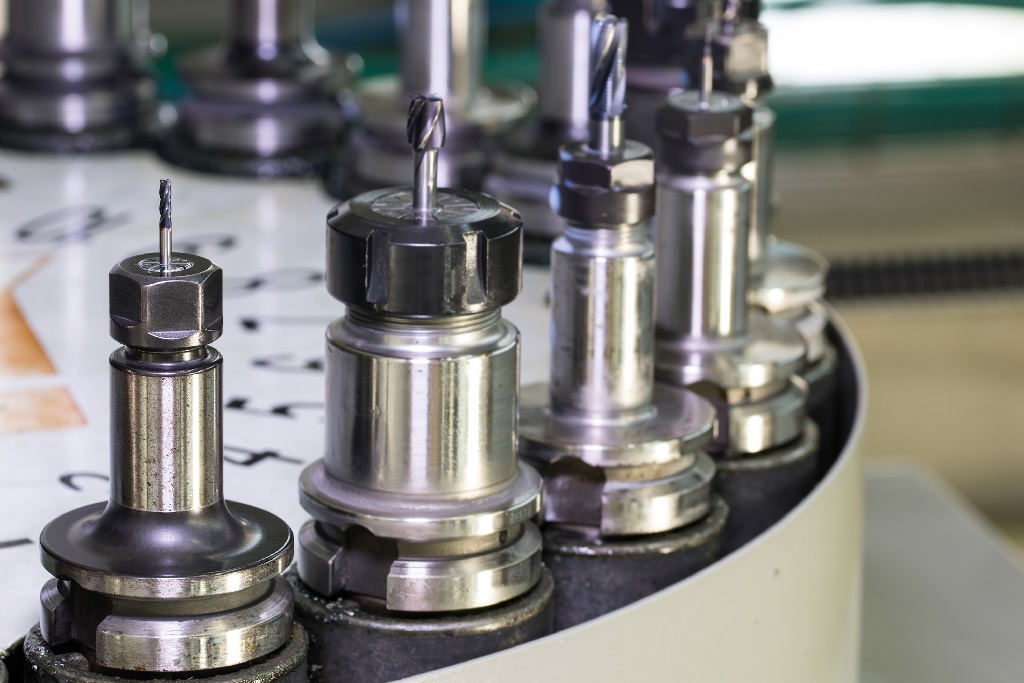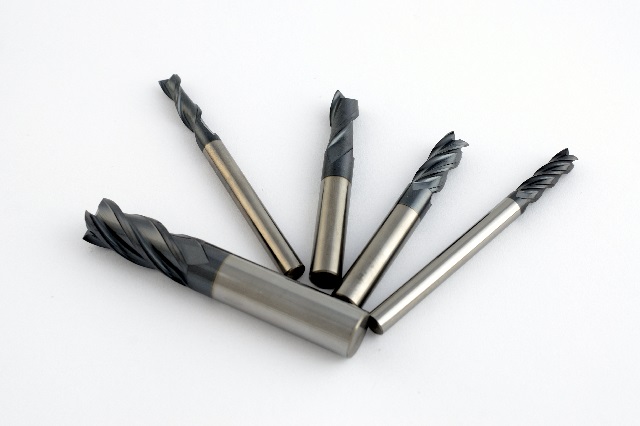
We spend a lot of time talking about the cnc machine but I don’t see many people mention the tooling. Maybe it’s just assumed. However, for a newbie like me, I want to capture the cost up front. At the very least, cover the basics. And no, I am not talking about the cheap set of end mills you can buy at harbor freight. While, I will end up with some of these especially for the first cuts to learn the machine I know enough to understand, tooling plays a major part in the success or failure of a project.
Tooling is made up of two parts…
1 – The Cutting Tool
These are the end mills, drill bits, center drills, chamfer tools, slitting saws and so on… If you want to burn a few hours, check out ENCO, LakeShore Carbide & Maritool.
Naturally, cutting tools come in almost as many flavors as there are types of cereal in the grocery store. If you are looking for an in depth analysis of tooling, this is not the place. One could write a textbook on tooling. I want to keep things simple for people like me just starting out.
Type
- Straight – Leaves a square corner and flat bottom used for many different types of cuts. A good place to start.
- Ball – Leaves a radius corner not ideal for creating a flat bottom. Will create 3D surfaces using many passes.
- Chamfer – Leaves a beveled edge often 45°
- Rougher (Corncob) – Leaves a square corner and flat bottom used to rapidly remove material sacrificing surface finish.
- Bull Nose – leaves a slight corner radius with a flat bottom.
For some excellent pictures and additional information on end mills, be sure and check out the HSMWorks CNC Handbook.
Material
- High Speed Steel (HHS) – general use will cut steel, aluminum and plastic. Shorter life compared to cobalt or carbide.
- Cobalt – excellent for hard to cut materials offers higher feed rates compared to HHS.
- Carbide – higher stiffness allows for higher material removal rates but expect to pay a premium price.
Note some plastics require a HHS end mill without a coating for best results.
Coating
- Titanium Nitirde (TiN) – best suited for cutting ferrous metals typically applied to HHS cutters
- Zirconium Nitride (ZrN) – high lubricity for cutting non-ferrous metals typically applied to carbide cutters
- For a complete overview, check out Harvey Tool’s nice coating guide.
Number of Flutes
End mills are available with as few as 1 flute up to as many as 8 flutes. Fewer flutes provide more room for chip removal while a higher number of flutes will generally produce a better surface finish. Two (2) flutes & four (4) flute end mills are most common.
- 2 Flutes – Great for general milling operations especially in softer materials like aluminum.
- 4 Flutes – Best suited for harder materials like steel or titanium.
Where do I start with end mills?
I am going to start with a set of two flute HSS end mills from Little Machine Shop found here End Mill Set, 6 Piece 2 Flute HSS (Note this is an affiliate link.) Nothing fancy, but at only $22.95 the price is right. I am not going to lose too much sleep over crashing one of these end mills into a part. I plan on cutting mostly aluminum so these should do very nicely.
If six end mills isn’t quite enough for you, you may want to check Harbor Frieght’s set of titanium nitride coated high speed steel end mills for $79.99 The set features both 2 and 4 flute center cutting end mills. The center cutting features allow the end mill to plunge without the need for a ramp in. The Titanium Nitirde (TiN) coating is best suited to general ferrous metals.
Advanced Options
The two advanced options that I find most interesting are the solid carbide and the insert style tooling. The solid carbide is the lower cost initial investment of the two. If you are just starting out like me, i recommend you get some experience with the HSS endmills before making the jump to solid carbide. In fact, some plastics cut best with the sharper edge that is achieved with high speed steel un-coated tooling.
The insert tooling has the advantage of replaceable inserts. The down side is the higher initial cost. Not only do you need to purchase the insert but also the insert holder. If you crash the tool, you will likely break the insert but not the insert holder. So you wasted a $15 insert. That’s better than a $30 dollar end mill. You can see how this might save you money in the long run.
I would love to say just don’t crash the mill but lets be realistic. The only way to really learn something is be doing. If you are too scared to hit cycle start then this isn’t the hobby/career for you.
I plan to start with what I know: end mills, drill bits and spot drills.
Ok, so how do you hold these things…
2 – The Tool Holder
End mills are useless without a way to hold them in a machine. This is the job of a tool holder. And no, a drill chuck is not suited to hold your end mills.
A collet is the most basic tool holder available. You will need to match the collet size to your end mill shank and the collet taper to your mill. In my case, the mini mill has an R8 taper. This means the inside diameter of the spindle is machined to accept an R8 collet. Now, the set of end mills I am planning to start with all have 3/8 diameter shank. This means I only need one collet to start.
Beyond the basic collet…
I am a big fan of the Tormach Tooling System (TTS). Combined with a power draw bar, it makes for a nice entry level tooling system.
What do I like about the TTS?
1 – Simplicity – Even I can understand what’s going on.
2 – Growth – It will allow me to evolve as I become a more experienced machinist.
3 – Machine Agnostic – TTS will work an my CNC mini Mill, a Bridgeport knee mill, and the Tormach PCNC series machines
4 – Cost – I haven’t seen a lower cost tooling system with the benefits of the TTS. If you know of another system, I would love to hear from you. Leave a comment below or e-mail me at Tim@DIYMachining.com
5 – Z Offset – The TTS registers on the nose of the machine spindle and not the collet which provides a repeatable Z height. Esentally, you can change tools by swapping the TTS tool holder and know where the Z height is for each tool. No need to stop in the middle of a program and re-zero the Z axis based on the new tool.
Click here for more details on the benefits of the TTS and to learn how it works.
Bonus, Tormach sells an R8 to TTS collet adapter made for the Mini Mills.
Final Thoughts
What is your favorite cutting tool or tooling system? Leave a comment below and let us know what works for you.
Thanks for reading. Until next time… Tim


How l could download your website file.
Thanks of your information .
Hi Razaia, if you are having problems with the downloads, send an email to me with the ones you want. Tim@diymachining.com